Transcend CF to PCMCIA Adapter

-
Thinkpad X41 with Sandisk 32GB SSD
IBM Thinkpad X41 modded with a Sandisk 1.8" UATA 5000 32GB Solid State Drive. First reboot after the mod.
-
Ubuntu boot on Transcend 400x CompactFlash
Ubuntu 11.10 booting on a Dell D420 laptop using Transcend 32GB 400x CompactFlash card as its drive (So called ghetto SSD :) ) Literature: ;) www.thinkwiki.org CPU: Core Duo 1.2Ghz Mem: 2GB of some-memory The cards specs say it should go up to 90 MBps read and 60 MBps write, hdparm and dd shows ~75 meg read and ~45 write with ext4 filesystem, the card connected directly to ATA interface. Overall it turns out to be kinda great upgrade for those who are stuck with those wild 1.8inch drives. Check out the original music by Kelsey James @ itunes.apple.com
-
Lexar ExpressCard CF reader
The Lexar ExpressCard CFReader transferring 100 raw files (843 MB) at around 75 MB/s.
-
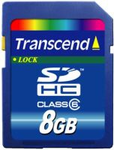
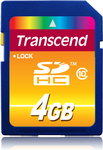
Transcend CF
AMAZON UK SPECIAL LINK www.amazon.co.uk Product Description Transcend CF Transcend Industrial Ultra Speed CF Card: TS8GCF100IThe Ultra Speed Industrial CompactFlash (Type I) memory card comes with capacities up to 8GB. Specially designed to meet the strict demands of high-end equipment and machines that run at extreme temperatures. Aside from their excellent temperature flexibility; these cards are exceptionally resistant to shock; vibration and dust; while consuming less power and maintaining ultra fast data transfer speeds. Their superb compatibility and durability makes them suitable for use in standard PCMCIA-ATA equipped devices such as industrial PCs; embedded systems; medical instruments; factory automation systems; network infrastructures and other industrial equipment.
-
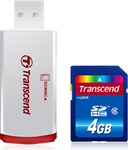
Transcend CF
Buy Now From AMAZON UK www.amazon.co.uk Product Description Transcend CF Transcend Industrial Ultra Speed CF Card: TS8GCF100IThe Ultra Speed Industrial CompactFlash (Type I) memory card comes with capacities up to 8GB. Specially designed to meet the strict demands of high-end equipment and machines that run at extreme temperatures. Aside from their excellent temperature flexibility; these cards are exceptionally resistant to shock; vibration and dust; while consuming less power and maintaining ultra fast data transfer speeds. Their superb compatibility and durability makes them suitable for use in standard PCMCIA-ATA equipped devices such as industrial PCs; embedded systems; medical instruments; factory automation systems; network infrastructures and other industrial equipment. Disclaimer: Neckerman Ltd is a participant in the Amazon Services LLC Associates Program, an affiliate advertising program designed to provide a means for sites to earn advertising fees by advertising and linking to Amazon. Amazon and the Amazon logo are trademarks of Amazon, Inc. or its affiliates.
-
The Amiga911 boot disk Part 1: Activating the Amiga911 disk and making a backup of it.
Warning! This is a highly unprofessional video which may contain a couple of fails :-) First the video shows how to activate one of the ready-made Amiga911 boot disks, then how to do some basic configuration like changing the screenmode, font(s) and keymap used by the system. At the end it shows how to create an ADF backup of the Amiga911 disk. Everything was done on a real Amiga 600 with the following specs: A603 Chip RAM expansion ACA630 accelerator card Kickstart 3.1 (softkicked) 2GB SanDisk Compact Flash card + IDE-CF adapter 4GB Transcend Compact Flash card + PCMCIA-CF adapter Please note the following about this video: 1. The video output used from the Amiga is composite, and this explains the rather lousy image quality. I tried several other solutions, but composite turned out to be the most reliable one. 2. The reason why the screen flashes sometimes is because my Amiga is accessing the Transcend CF card connected to the PCMCIA port, this only happens when using composite video output on my A600. For more info about the ready-made Amiga911 boot disks and Amiga911 Maker in general, you can go to this site: amiga911maker.site11.com
-
The Amiga911 boot disk Part 3: Installing ClassicWB directly from HDF image file.
Warning! This is a highly unprofessional video which may contain a couple of fails :-) Here you can see how to mount a HDF image file on a real Amiga so that files can be copied from it, but have in mind that this requires a 020 or higher CPU. This video does actually take you through the whole process of first copying everything from a ClassicWB HDF image file, and then continue with activating ClassicWB. All of this took around 46 minutes to do. Everything was done on a real Amiga 600 with the following specs: A603 Chip RAM expansion ACA630 accelerator card Kickstart 3.1 (softkicked) 2GB SanDisk Compact Flash card + IDE-CF adapter 4GB Transcend Compact Flash card + PCMCIA-CF adapter Please note the following about this video: 1. The video output used from the Amiga is composite, and this explains the rather lousy image quality. I tried several other solutions, but composite turned out to be the most reliable one. 2. The reason why the screen flashes sometimes is because my Amiga is accessing the Transcend CF card connected to the PCMCIA port, this only happens when using composite video output on my A600. 3. You may notice that the DiskImageGui window is open almost all the time in this video, but it really doesn't have to be. You can quit and start it again at any time, and it will not affect the mounted virtual drives in any way. 4. Copying the 500 MB System.hdf file from the PCMCI-CF card to my Work partition took around 12 minutes. 5. Copying everything from the <b>...</b>
-
The Amiga911 boot disk Part 2: Setting up a harddisk on the Amiga by using HDToolbox.
Warning! This is a highly unprofessional video which may contain a couple of fails :-) There are two programs for setting up harddisks included on the ready-made Amiga911 disks, and they are HDToolbox and HDInstTools. This video shows how it can be done by using HDToolbox. As for the file system, I decided to use SmartFileSystem (SFS) on the partitions since I think it's better than FastFileSystem (FFS). Everything was done on a real Amiga 600 with the following specs: A603 Chip RAM expansion ACA630 accelerator card Kickstart 3.1 (softkicked) 2GB SanDisk Compact Flash card + IDE-CF adapter 4GB Transcend Compact Flash card + PCMCIA-CF adapter Please note the following about this video: 1. The video output used from the Amiga is composite, and this explains the rather lousy image quality. I tried several other solutions, but composite turned out to be the most reliable one. 2. The reason why the screen flashes sometimes is because my Amiga is accessing the Transcend CF card connected to the PCMCIA port, this only happens when using composite video output on my A600. 3. If you want to use an Amiga911 disk for setting up a harddisk, it is REALLY important that you make sure that a file system is added to the harddisk BEFORE you reboot the Amiga! HDToolbox will by default automatically add L:FastFileSystem if it can be found on the system, and after booting an Amiga911 disk, it should be present on the Ram disk if the Amiga has more than 2MB RAM installed. But if the file <b>...</b>
-
The Amiga911 boot disk Part 4: Installing Workbench + BetterWB directly from ADF image files.
Warning! This is a highly unprofessional video which may contain a couple of fails :-) Here you can see how to install Workbench directly from ADF images by using some virtual floppy drives, but have in mind that this requires a 020 or higher CPU. A couple of assigns has to be made so that the Workbench installer can find certain files it needs on the Install3.1 disk. The video also shows how BetterWB can be installed on top of Workbench by using the mounted ADF images directly, but since the install script by default uses SYS: as destination for extracting the zip archives, the script has to be modified since SYS: is assigned to Ram:System after booting an Amiga911 disk. All that's required, is to simply replace all occurrences of SYS: with the device name of the Workbench partition (in my case DH0:). Everything was done on a real Amiga 600 with the following specs: A603 Chip RAM expansion ACA630 accelerator card Kickstart 3.1 (softkicked) 2GB SanDisk Compact Flash card + IDE-CF adapter 4GB Transcend Compact Flash card + PCMCIA-CF adapter Please note the following about this video: 1. The video output used from the Amiga is composite, and this explains the rather lousy image quality. I tried several other solutions, but composite turned out to be the most reliable one. 2. The reason why the screen flashes sometimes is because my Amiga is accessing the Transcend CF card connected to the PCMCIA port, this only happens when using composite video output on my A600. 3. You <b>...</b>


-
Populaire
-